Tuesday, March 31, 2009

The Apartment Pizza!

Sunday afternoon I was struck with the intense desire to eat mass quantities of pizza. Now I don't get into snotty vegan trash talking, so I wont talk about the locations themselves, but I will say that the vegan pizza options in Philly are good only because they are vegan. They do not satisfy my cravings for serious pizza. It probably has something to do with the fact that I think that the pizza in 90% of this country is terrible and not worth paying for. This post is not so much about sharing a recipe as it is about sharing an adventure.

I already had some left over fra diavlo sauce from last week, so that was all the push I needed. I set off in the gorgeous Sunday sun, in search of ingredients. A stop at some Italian Market veggie stands, whole foods and a pizza place that has decent crust, yeilded marinated artichoke hearts, spicy olives, zucchini, red onions, fresh raw dough and Follow Your Heart soy cheese(I know that I talk a mean game about not wasting money on pre-packaged foods, but this stuff is awesome and totally worth shelling out a little extra cash for.) I then headed right home and got to work. All told I spent maybe $20 on ingredients for two huge gourmet pizzas.

You will notice that I bought dough from a pizzeria, instead of making my own. Not all pizzerias will sell raw dough, but some will. Having a good relationship with the owner certainly helps. Most of the time I do make my own dough, but I was more interested in spending the afternoon walking around in the sun, then fussing with dough. If you want to take a shot at making your own, I use Peter Reinhart's recipe from his book, The Bread Baker's Apprentice that I found in the 101 Cookbooks Blog

First I stretched the dough out and set it in sheet pans, which I then covered with a damp towel to rise a bit. I prefer a pan style pizza. I like how the edge crust rises up nice, and the under crust is crispy. My face is covered in this picture, not because I care that anyone knows what I look like, but because I look like a total goon. It is a good picture of dough stretching though.
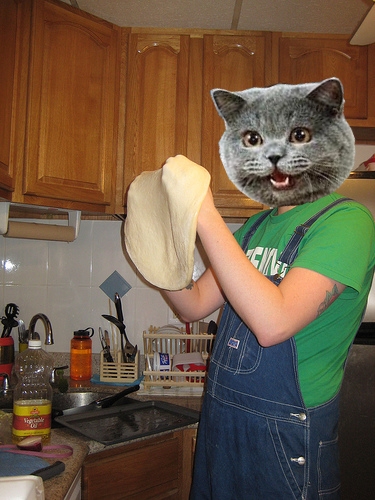


To stretch dough:
  • Start by spreading a healthy layer of flour on your counter.
  • Put your dough ball on the counter and use your palms to press it down into a flat disk. I find it best to use a slight turning motion while pressing repeatedly.
  • Once the ball is a disc, make a sign languace C with both hands, laying the dough over the back of your knuckles.
  • begin rotating the dough and stretching it slightly by skooting your hands back and forth. Most of the stretching should come from the weight of the dough, not from your movement. Be careful to keep your hands towards the edge, or the center will get too thin.
  • If you use rectangular pans like I do, stretch the dough until it overlaps the narrower sides of the pan by about an inch on each side, and then man handle it a little to make it fit the rectangular shape.
  • Make sure that the pan is greased with vegetable oil before you put the crust in it.

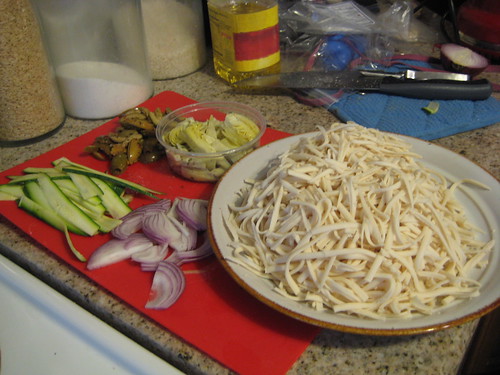
Once the dough was stretched, I set too prepping all of my ingredients. There are very few things in this world that I am anal about. Food prep is one of them. Clockwise starting with the plate, we have Follow Your Heart cheese, red onion, thin sliced zuchini, spicy olives and marinated artichoke hearts. Not pictured is veggie burger crumble, which I kept in the freezer.


Once the the dough had set for about 20 minutes, I got it ready to hop in the oven. I made two pies:

One White -
Crust smeared with:
1/2 head of garlic, 1 tbsp olive oil and the ends of the soy cheese that got too small to safely grate. Put all ingredients in a food processor or blender and puree into a paste.

Topped with:
Marinated artichoke hearts, cut into 8ths, thinly sliced zucchini (I used a veggie peeler to keep my slices thin and consistent) red onions and soy cheese.
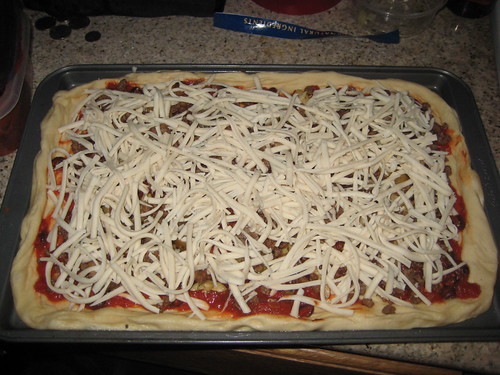
One Red -
Crust smeared with: Left over Fra Diavlo sauce, but any left over pasta sauce would work ok (as long as you made it your self.)
Topped with: Veggie burger crumbles, spicy olives and soy cheese.

The red pie waiting on deck


Baking the pies:
  • Pizza LOVES a very hot oven. I usually bake pies at 550 degrees, which is as hot as most conventional ovens will go.
  • If you have a pizza stone, take out your oven racks and place the stone on the bottom for gas ovens. For electric ovens, put your stone on the lowest rack.
  • Start your pies in the sheet pan, and leave your oven light on, you will need to watch them pretty closely. As the pies grow bubbles, reach in and pop them with a knife or pizza cutter, so you don't end up with a mutant pizza.
  • Check the pie every few minutes by lifting a corner slightly with a spatula. When the crust is firm enough that the pie starts to lift out, instead of just bending the corner, slip the pie out of the pan and let it finish just sitting on the rack or stone.
  • Your pie is done when the outer crust has a nice golden brown color.

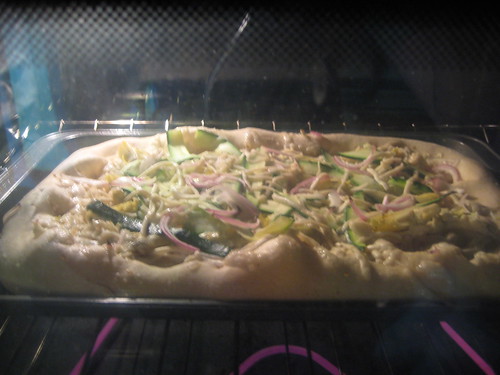
The white pie just about firm enough to come out of the pan and finish baking.
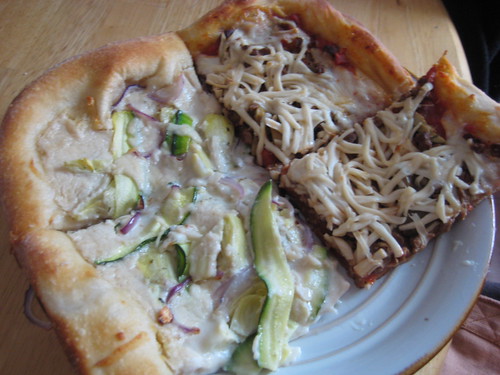


A plate of amazing


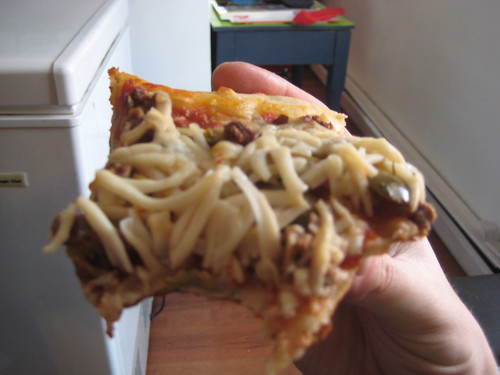
A first person view of the best moment of my year.


Thursday, March 26, 2009

Usin' The Sauce.

Something you will notice in a hurry about most of those sauce recipes, is that they make a whole lot of sauce. The reason for that is simple, I freaking love any and all(vegan) tomato sauce. I suppose there are also some other reasons:
  1. Sauce not only holds really well in the fridge, and for months in the freezer, but it is actually better a few days after you made it.
  2. I often make a few pounds of pasta along with the sauce, and then portion that out into sandwich bags, and have work lunches (or lazy dinners) for the week.
  3. In addition to being a great leftover in it's own right, sauce is a great ingredient. I often add it to other recipes to cut down on the cooking time that using fresh tomatoes would add.
It's reason number 3 that I am going to talk about today, and probably in my next post or two. What can I say, when I get Italian food on the brain, it is hard to think of anything else.

I hit snooze far too many times this morning, got ready in a hurry, stepped out the door to walk the dog and instantly realized that this is a soup day. The sky is gray and overcast, it is chilly but not freezing and there is a heavy mist in the air, that gets you wet but won't quite become rain. It is just the kind of day when I want to sit inside watch dvds and eat soup. I may have to go to work, so sitting on my couch and watching movies all day is out, but soup is definitely still on the radar for dinner. Since I still have a little sauce left from that batch that prompted the last entry and I always have veggie stock on hand, so I have got a pretty good head start on a pot of Pasta fagioli (say it with me, "Pasta Fah-zool.") This is easily my favorite soup ever.

Pasta Fagioli
Like a lot of other Italian dishes, if you asked a hundred different grandmas, you would get a hundred different recipes. The things that these recipes always share are small white beans and short cut pasta. Most recipes also include a tomato broth, but not all. Some also have other veggies mixed in. I make what is pretty much the standard version, Cannelinni Beans, Ditalini pasta and tomato broth.

Ingredients:
5 - cups of veggie stock
2 - cups of left over sauce (I like to use Fra Diavolo for this, but any will work.)
1 Tbsp - olive oil
3 - stalks of celery finely diced
1 - carrot finely diced
1 - small onion finely diced
1 - 15 fl oz can of Cannelinni Beans drained and rinsed
1/2 pound - dry Ditalini pasta

Equipment:
1 - large stock pot
1 - med soup pot
1 - strainer
knife, cutting board, etc...


Cooking:
  • The first thing you need to do is make a decision, do you want to eat soup, or a thick pasta dish. If soup is what you are looking for, you should start by cooking the Ditalini according to the directions on the package and keep it separate. If you want a thick pasta dish, you can just add the pasta to the soup while it is cooking.
  • Put your celery, carrots, onions and oil in the large pot over medium high heat. Saute until the onions and celery become translucent and the carrots soften.
  • Add the beans, stock and sauce and turn the heat up to high.
  • Stir regularly until the pot boils.
  • If you are looking for soup (and already cooked your pasta) you are done. Just add the pasta to the pot and serve.
  • If you are looking for a thicker pasta dish (and haven't cooked your pasta yet) add the raw pasta to the pot. Continue stirring regularly until the pasta is cooked through. This will soak up a lot of your broth and make a thicker stew like pasta dish.

Tuesday, March 24, 2009

Il mio cibo preferito è il tipo vegano.

I may not be Italian, but I grew up in an EXTREMELY Italian part of New York state, so my love for Italian fare has roots that stretch back as long as I can remember. While a lot of Italian food is heavy with meat and dairy, the cuisine in general is all about fresh delicious ingredients. Many Italian dishes are vegan already and with just a little adjustment, most Italian dishes can be made vegan while staying tasty and healthy (or becoming even healthier.) I am sure to write about vegan Italian food on a regular basis, but let's start with square one.

Whether you call it Sauce or Gravy or make any of the many variations, tomato sauce is one of the staples of Italian cuisine. It is the center piece of many Italian dishes, and assists in many others. I am sure that is why it has also become so popular in American culture. Unfortunately along with popularity, comes mass production. I won't go so far as to say that all mass produced commercially available tomato sauce is inedible, but I will say that jarred sauces that are even remotely decent are so few, far between, over priced and rarely vegan, that they aren't even worth considering. This is especially true when you consider that delicious home cooked sauce is so freaking easy to make.

My goal for this post, is to start with a basic marinara recipe, and then show how changing just a few things about that recipe can give you some delicious variations.

Marinara Sauce

To Start:
You can make sauce in a hurry if you need to. While cooking, you really only need to bring the pot to a boil, and then let it simmer for 10 or 15 minutes. If you rush your sauce though, the end product is going to suffer. To really develop the delicious flavor of a pot of good sauce, it takes time. This isn't always an option though, when you have a job and other responsibilities, and you can't be bothered to spend 3 hours cooking dinner. I know this just as well as anyone else. My solution? Cook sauce on a day off, and cook enough of it to last you a while. It will freeze fantastically and will also last a good week in the refrigerator. I actually prefer the flavor of sauce a few days after it was originally cooked.

If you are in a hurry and want to eat right away try making Pomodoro, which doesn't need to simmer for nearly as long (more on this later)

Ingredients:
1 - medium yellow onion, minced
6 - cloves garlic (more or less to taste. I tend to use a lot of garlic.) minced
1 Tbsp - Italian seasoning
1 Tbsp - Olive oil
Salt to taste/ health restrictions
1 - 28 oz. can whole peeled tomatoes
1 - 28 oz. can crushed tomatoes
2 Tbsp - tomato paste

Equipment:
1 large sauce pot
1 large(punch type) bowl
knife, cutting board, etc...

Cooking:

  • Put your large pot over med - med high heat, and add the onion, garlic, oil, Italian seasoning and 1 tsp of salt. Saute, stirring regularly, until the onions have become soft and translucent.
  • While the onions, garlic, etc... are sauteing, open both of your cans of tomatoes. The crushed tomatoes are ready to go, so just keep them handy. The whole peeled tomatoes need some work.
  • Empty the can of whole peeled tomatoes(and all the liquid) into your large bowl and sort through them to remove any stems or bits of skin that are left stuck to the stem end of the tomatoes.
  • Once you have cleaned out all of the undesirables, loosely crush the tomatoes by squeezing them in your fist. The idea here is to just break them up a little, not to totally pulverize them.
  • Once your onions are done simmering, add both the cans of tomatoes and turn the heat up to high. Stir the pot constantly until it comes to a boil.
  • When the sauce comes to a boil add the tomato paste stir it in well and turn the heat back down. The idea is to turn the heat down until the sauce just simmering.
  • From this point it's all time and patience. Ideally the sauce should simmer for 3 - 4 hours, stirring occasionally, the longer the better. If you are lucky enough to have a crock pot or slow cooker, go ahead and transfer the sauce into that, set it to medium low and let it go.
  • Just before I am finished cooking, I adjust the salt. Unless you prefer very little salt in your food, the 1 tsp that we added to the sauté is probably not enough. I like to wait until now to add more salt because the pot will reduce quite a bit as it simmers, and it is easy to have it go from tasty to over salty, if you add the salt early and then simmer for a long time.

Variations on a theme

Fra Diavolo
The term Fra Diavolo (litteral translation "Brother of the devil") refers more to a type of sauce than to one specific dish. I have seen it on many different menus in my time and rarely have the dishes been very similar, other than one thing. This sauce is supposed to be SPICY, hence the name. The version that I make is pretty much a spicy pepper filled marinara.

Changes:
  • Instead of dicing your onions, cut them in half once, and then cut them cross wise into thin strips.
  • Add 4 Italian Long Hot peppers, also cut into thin strips, to your sauté. If you cant find Italian Long Hots, pretty much any larger medium heat chili pepper will work.

Bolognese (Americanized)
Most Americans think of a thick meaty tomato sauce, when they hear the term Bolognese. While this is not really correct (the actual Italian dish is mostly meat, with just enough tomato and wine to make it a sauce) it sure is tasty. This hearty sauce is great with a hefty pasta that can hold up to it. My favorites are penne, ziti or rigatoni.

Changes:
  • Add 1/4 cup of red wine to your sauté and let it cook for about a minute, just before adding your tomatoes. Whatever kind you have handy is fine, so long as it is not too sweet. Be careful, while most wine wont flash fire like stronger booze does, some will.
    This is also tasty without wine, if you prefer not to use alcohol.
  • let a bag of frozen veggie burger crumbles thaw, while your sauce simmers and mix it into your sauce during the last 15 minutes of cooking.

Pomodoro
Pomodoro is a fresh fragrant tomato sauce that pairs well with light pastas, like angel hair. It is traditionally made with fresh tomatoes, but you can get away with using canned if you like.

Changes:
  • This sauce tends not to be as good reheated, so I generally make about half as much. Use 1/2 as much onion and garlic, and eliminate the crushed tomatoes, tomato paste and Italian seasoning.
  • If you are feeling adventurous, use 10 fresh plum tomatoes, cut into quarters, instead of the can of whole peeled tomatoes.
  • Once you have sautéed the onion and garlic, add the tomatoes and turn the heat up to high.
  • Once the sauce boils, salt to taste, remove from heat, and mix in about 20 leaves of fresh chopped basil.

Nonna's 10 hour Marinara
Nearly every Italian grandmother I have met has two things in common. 1. She tried to force me to eat something within minutes of meeting her and 2. She has a secret recipe for Marinara sauce so good that it will make you want to cut your tongue out, so it is never again subjected to inferior food. The only thing that I have been able to figure out about these closely guarded secrets, is that they almost always use fresh tomatoes instead of canned, and they have to cook for a hell of a long time. So this is my take on Italian Grandma style sauce.

Changes:
  • Replace the canned tomatoes with about 15 large fresh tomatoes, and 3 cups of water(you will need the extra water to make sure that the tomato is totally cooked, before it igets over thick and burns) and forget about the tomato paste.
  • To prepare the fresh tomatoes you are going to need a large pot of boiling water, and a large bowl of ice water.
  • Remove the stem/core spot at the top of the tomato and cut a very shallow X into the bottom of each tomato. Just deep enough to cut through the skin.
  • Place several tomatoes at a time into the boiling water. You will probably need to do this in 3 or 4 batches.
  • After 30 seconds remove the tomatoes to the bowl of ice water, and leave them there for 5 minutes.
  • Once the tomatoes are totally cooled take them out and peel off the skin, which should now be nice and loose.
  • Once the tomatoes are skinned, they need to be seeded. To do this, cut the tomato in half, perpendicular to the stem and use a butter knife or small spoon to scoop the guts out.
  • After they have been skinned and seeded, they should be diced.
  • This is going to yield a whole lot of tomato. Don't worry, most of that volume is water, which will boil away.
  • Once you have the fresh tomatoes prepped, this recipe is pretty much the same as the original recipe, except that it takes 10 hours. I know that seems absolutely ridiculous, but trust me it is absolutely worth every minute.